Table of contents
- Register model run records by CSV Templates
Register model run records by CSV Templates
Overview
The Provenance Store user interface facilitates the registration of provenance through the generation and ingestion of CSV templates. These CSV templates are autogenerated from a Model Run Workflow Template defined in the entity registry.
Prerequisites
System Permission
To register model run records in the Registry, you must have Registry Write permission - see requesting access for more information.
Reaching the Provenance Registration Tools
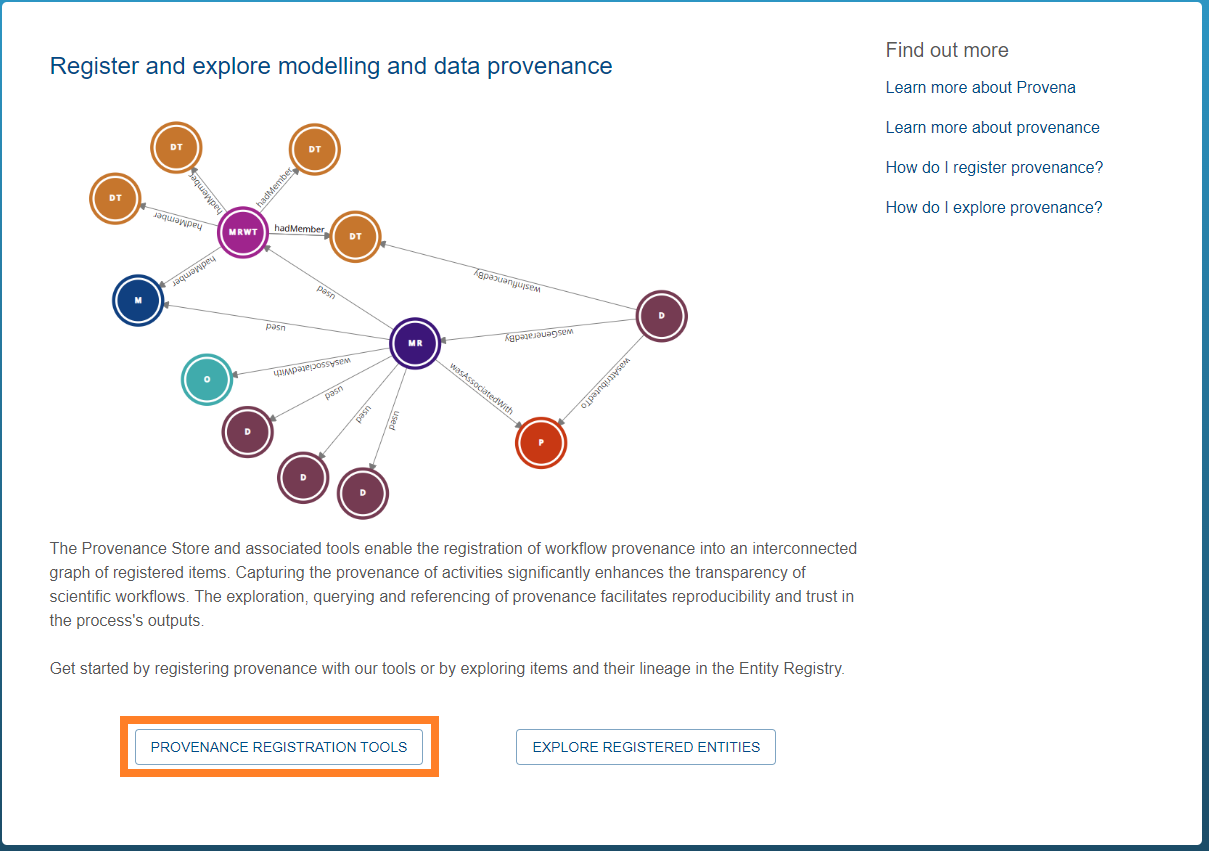
There is a “Provenance Registration Tools” button located on the Provenance Store’s home page. You can also select Registration Tools located on the top horizontal bar next to the Contact Us button.
| Accessing Provenance Tooling |
|---|
 |
How to register Provenance by CSV
Identify or register a Model Run Workflow Template (Step 1)
The first step is to generate a CSV template. As the CSV templates are autogenerated from Model Run Workflow Template entities in the registry, you must first register a Model Run Workflow Template entity or identify your existing template. See here for help registering a Model Run Workflow Template.
Download the CSV template (Step 2)
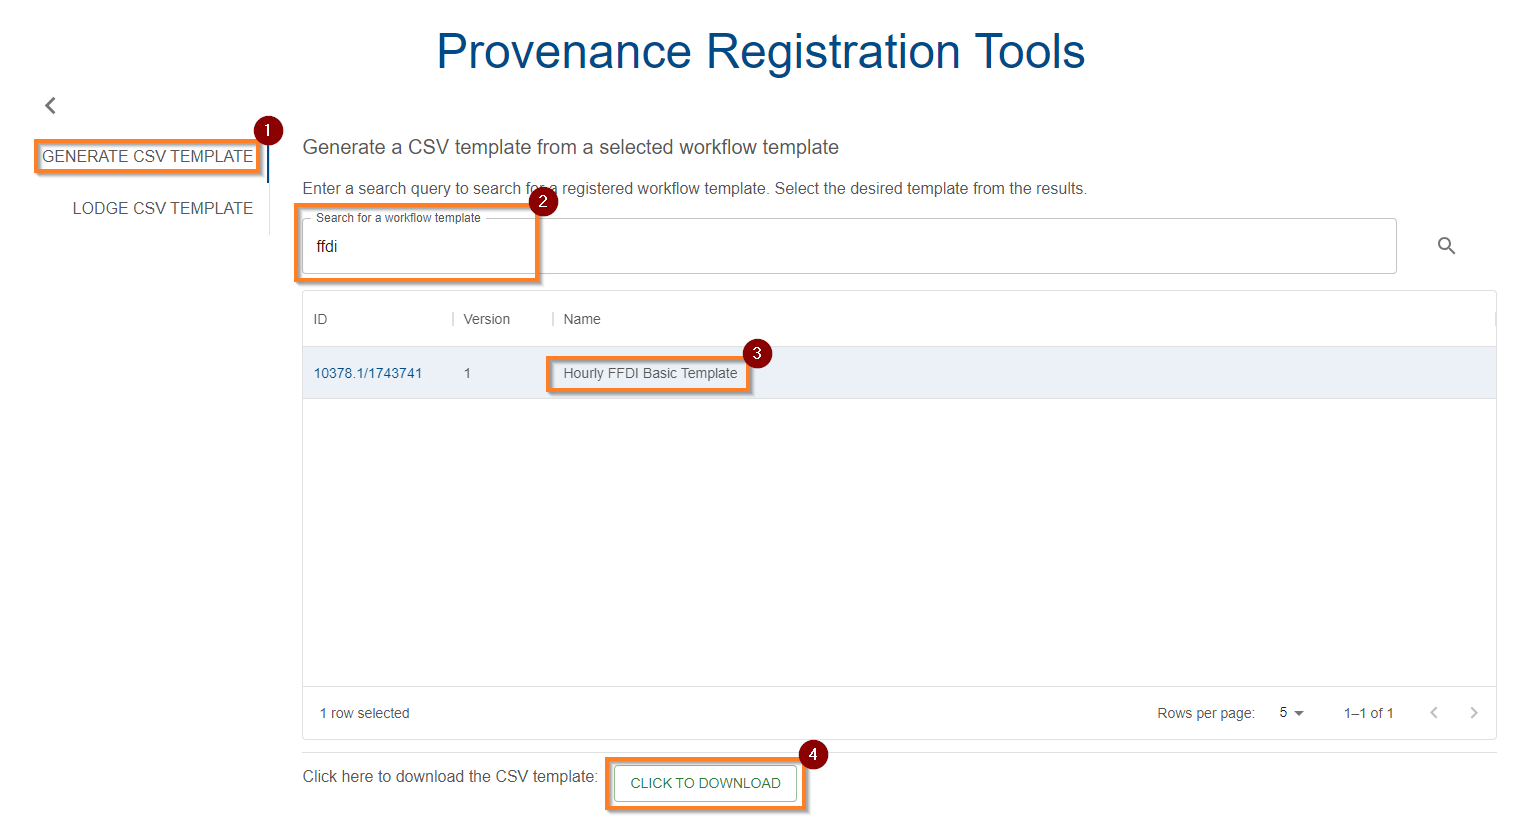
Upon successfully creating a Model Run Workflow Template in the entity registry, it’s corresponding CSV template will be searchable in the Provenance Registration Tool’s “Generate CSV Template” tab (1). You can search for it using its associated ID or name (2). When you have found it, select it (3), and then select “click to download” (4) located at the bottom of the tool box.
| Download CSV Template |
|---|
 |
Fill in the CSV template (Step 3)
Opening the template, we see the fields to be filled in listed across the top as headers. Each row that is filled in corresponds to a single Model Run.
Info! Fields beginning with underscores are automatically filled in by the Information System so must not be manually filled in.
The following provides a brief description on the default fields required by the Provenance System:
-
Display Name: This name will be displayed in the Registry and other system views. Choose a short descriptive title for this model run.
-
Description: A brief description of the Model Run.
-
Model Version: Specify the version of the model software that this model used. This could be a version number, a Git Hash or some other version identifier E.g. “1.0.3”.
-
Agent ID: The ID of the agent responsible for running the model run. This is the ID of the person/organisation in the entity registry. To obtain an ID for a person, first try searching for them in the registry, if they don’t exist, they will need to be registered to create an ID for them. See here for help on establishing the required entities and How do I register a model run workflow template?.
-
Study ID: (Optional) The ID of the Study which informed or necessitated this Model Run. You can leave this field blank to exclude this link.
-
Execution Start/End Time: The respective start and end time of the model run execution.
Info! The format for the start and end time is a profile of ISO8601 (called RFC 3339) in which a space is optionally allowed to separate the date and time instead of a "T". Additionally, the IS will also accept "/" in the date section, and will allow for the timezone and seconds to be omitted. If the timezone is omitted, UTC will be assumed by the system. If seconds, are omitted, the IS will record 00 for this value. E.g. inputting 2022-11-28 12:23 will go be assumed to equal 2022-11-28 12:23:00+00:00. Some example formats (for which a 'T' can also be used to separate the date and time):
- YYYY-MM-DD HH:MM:SS+HH:MM
- YYYY/MM/DD HH:MM:SS+HH:MM
- YYYY-MM-DD HH:MM:SS
- YYYY/MM/DD HH:MM:SS
- YYYY-MM-DD HH:MM
- YYYY/MM/DD HH:MM
-
Input/Output Dataset ID for Template: (display name) XXXXX.X/XXXXXXX: This refers to the ID of the Dataset being used to fill the template. This requires input and output datasets to be registered in the datastore to obtain an ID for them. See registering a dataset for help.
-
Annotation: (annotation_key): A collection of required or optional annotation keys provided at model run time. See model workflow configuration for more info.
-
Input/Output Resources: This refers to the path to the deferred resource from within the dataset. E.g., “data/connectivity/file.txt”. Please see How do I register a dataset template? for information on resources.
Uploading the CSV (Step 4)
Once you have filled in one or more rows of the CSV template, you can upload this to the provenance store to “lodge” the run(s) and register its provenance. Each row in the CSV corresponds to a single model run record to lodge.
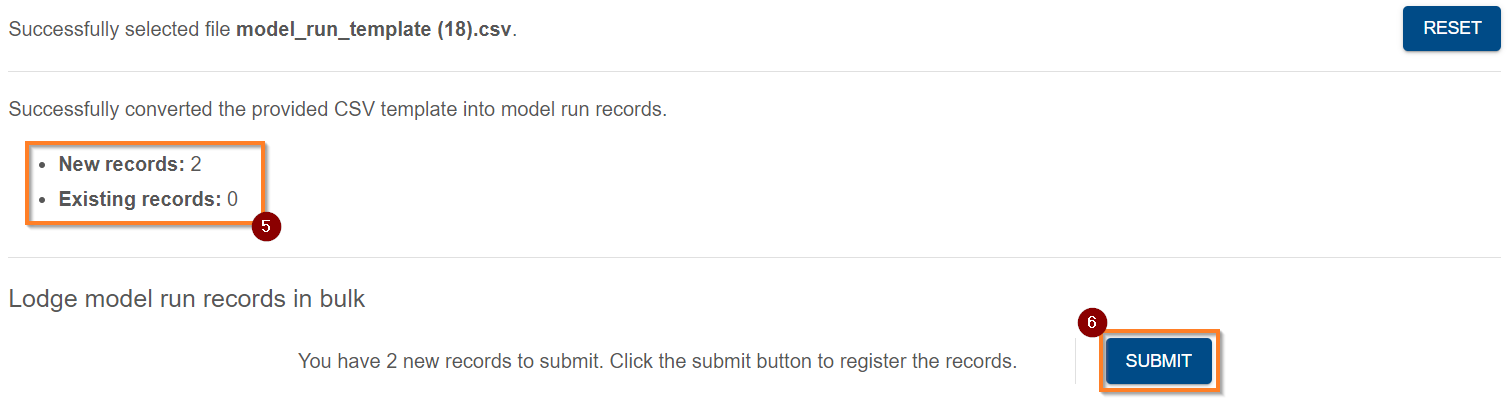
In the Provenance Registration Tools window, select the Lodge CSV Template (1) from the left side panel. Select “Choose file” (2) to select the file to upload. Click upload (3) if you’re happy with your selection, or Reset (4) if not. Click upload (3) and observe the number of new and existing records detected in the CSV (5). To finalise the upload, press “submit” (6) and the CSV will be lodged and the IS will begin to process the records.
| Upload CSV Template (1-2) |
|---|
 |
| Upload CSV Template (3-4) |
|---|
 |
| Upload CSV Template (5-6) |
|---|
 |
Monitoring submission (Step 5)
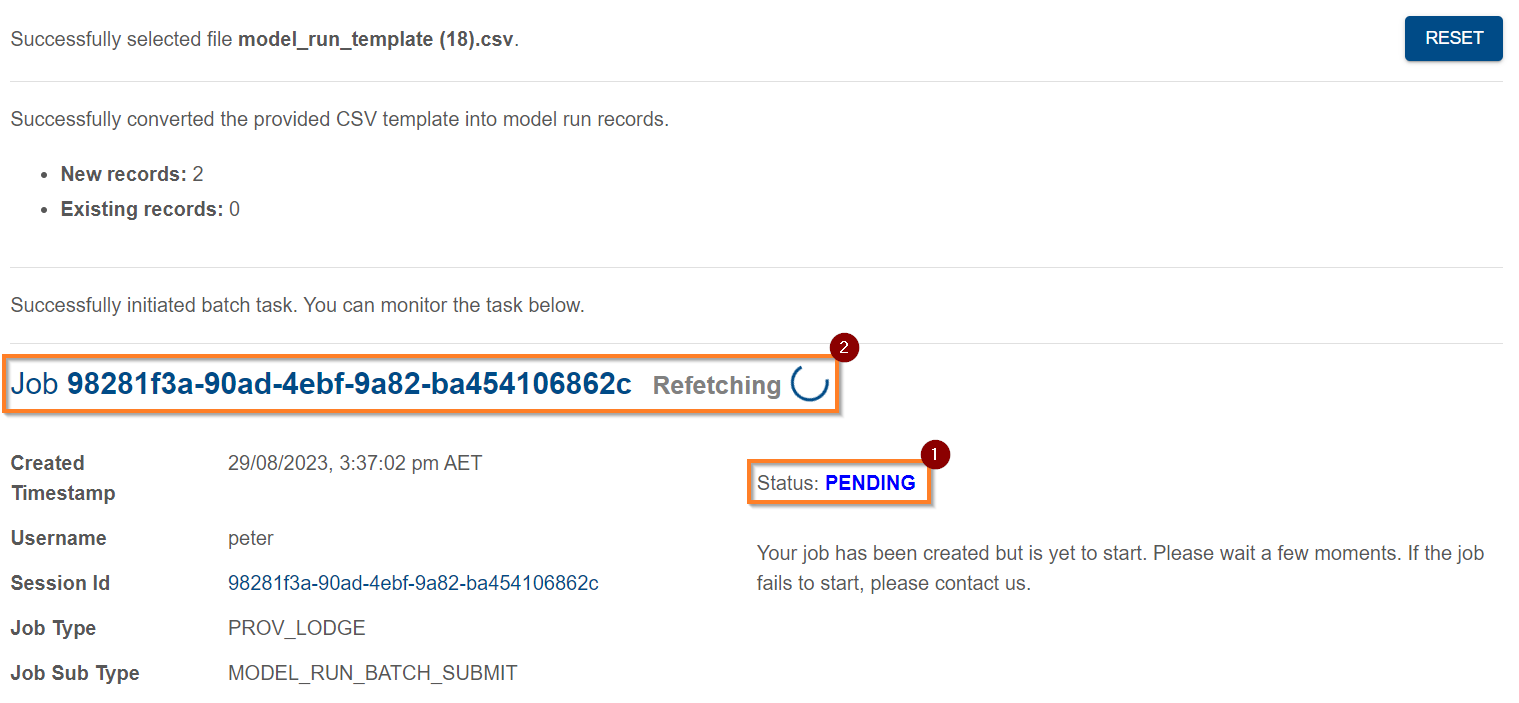
Upon submission, the system will lodge a job. This first job, with type “MODEL_RUN_BATCH_SUBMIT” will take some time to progress through the job lifecycle. As shown below, the status (1) of the job is automatically monitored (2).
| Model Run Batch Submit Pending |
|---|
 |
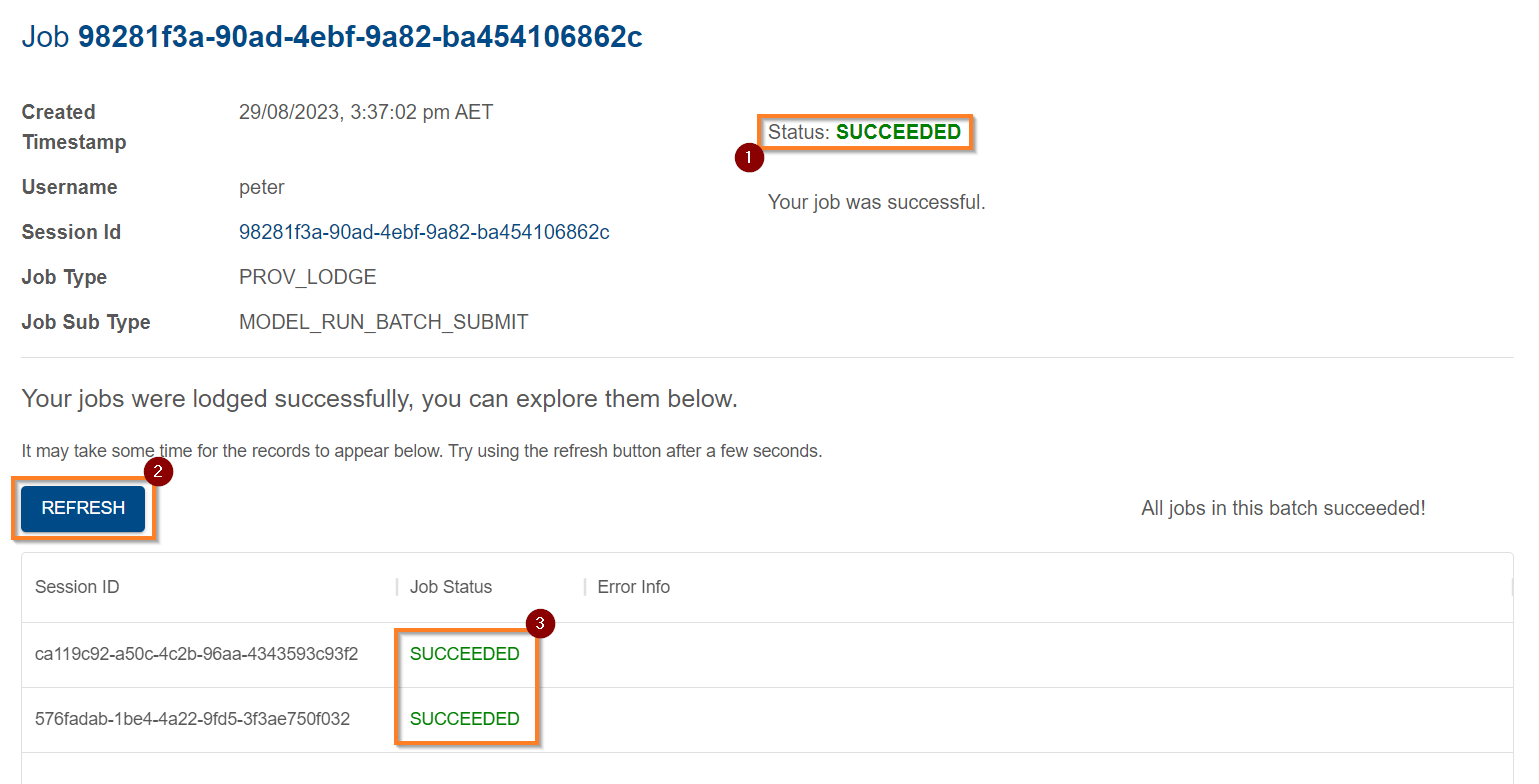
After around 30-40 seconds, you should see the status transition to SUCCEEDED (1). Each row in your uploaded CSV template will correspond to a task in the following view. You can refresh the list by clicking Refresh (2). Once a job is succeeded (3), you can click on it to get further details.
| Model Run Batch Submit Completed |
|---|
 |
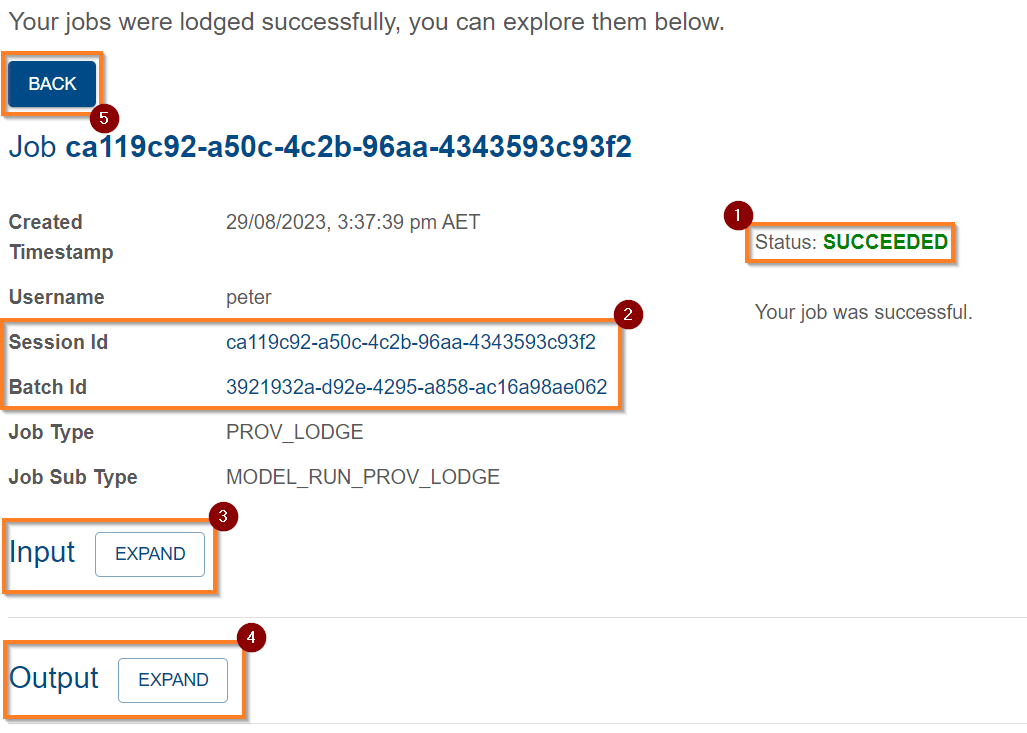
Clicking on a job within the batch view above, shows the detailed view below.
You can see the status (1), metadata about the job, including the session and batch IDs (2), and the input (3) and output (4). You can return to the previous view with the back button (5). If an error occurred, the FAILED status will appear in the previous list view, and the details view will show the error information.
| Model Run Job Details |
|---|
 |
Expanding the output (4, above), shows the following details, which includes the Model Run Record’s ID (1). Clicking this ID (1) will open the Registry entry for this model run record. To collapse the output, you can click Collapse (2).
Re-downloading to get an updated template (Step 6)
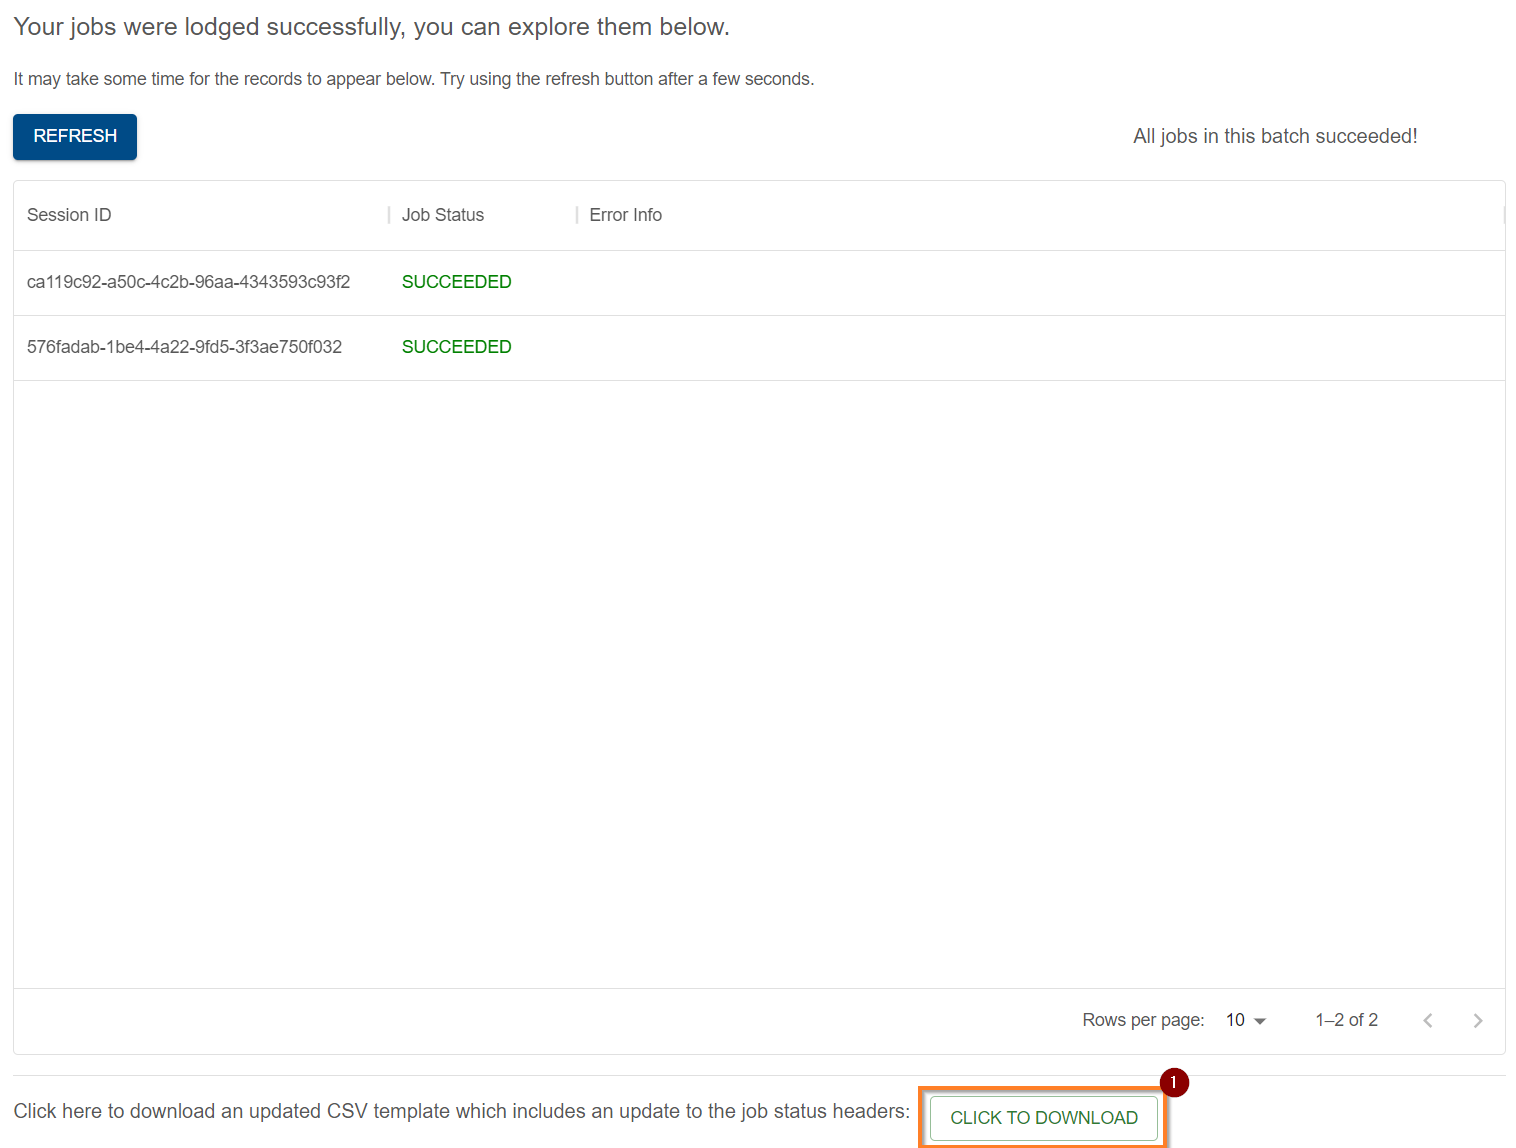
Warning! To avoid duplication of provenance records, if you wish to use the same template, re-download it as the system will provide you with a CSV with the _job_id field filled in for recorded runs, preventing them from being duplicated in further submissions. See the instructions below.
After just uploading a CSV with model runs, re-download it using the button (1) below the list of its jobs. This is to obtain the template updated with the Job ID’s of recorded runs so they are not duplicated in future submissions.
| Re-downloading a lodged Template for future additions |
|---|
 |