Uploading dataset files
Appropriate access
To upload dataset files, two access types are required:
- Role level access: you must have write access to the Entity Registry - see requesting access for information on how to request access. If you registered the dataset, you will already have this access.
- Resource role access: datasets are registered resources in the Registry - uploading dataset files requires the ‘Dataset Data Write’ role. If you are the owner of this dataset, you will already have this role. For more information about access control for registered entities, see access control.
File types and maximum file size
The Provena Data Store can store a variety of data files e.g. text, csv, netCDF, word documents, images, video etc… Users can upload files or folders using either the AWS web console (GUI), AWS command line interface (AWS CLI) or a program like WinSCP.
While the AWS CLI can handle large files (>100GB) and the AWS Console GUI can handle up to 160GB uploads, please contact the Provena team if you know you will be uploading large or numerous files. For technical information about the storage limitations of the S3 service (which the data store is built on) you can review the AWS FAQ here.
The maximum individual file size that can be uploaded is 5TB.
Uploading dataset files
Info! You will require a set of Provena credentials to be able to upload data to the AWS S3 data store. See details on the dataset metadata page Obtaining AWS credentials.
Dataset files can be uploaded once the metadata record is created. You can choose between using a GUI or command line. The AWS web console (GUI) can be used for files/folders up to 5GB in size. Larger files should be uploaded using a program like WinSCP or the AWS CLI v2.
Uploading data via AWS Web Console (small to medium files)
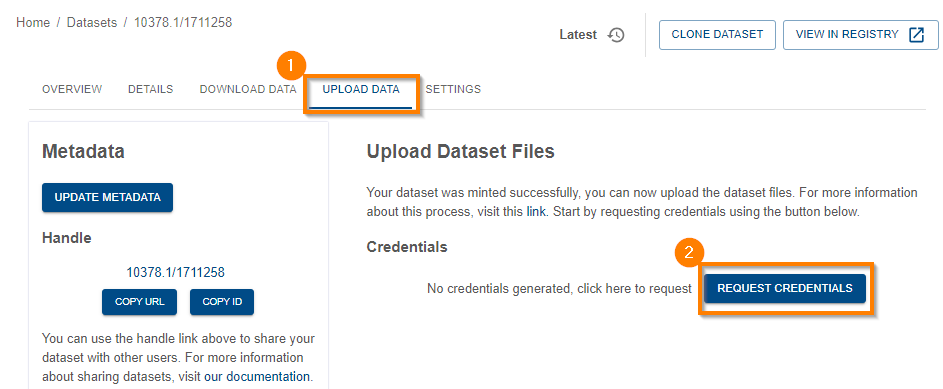
To start the upload process, (1) click on the Upload data tab, then request credentials by (2) clicking the Request Credentials button.
| Uploading small to medium files |
|---|
 |
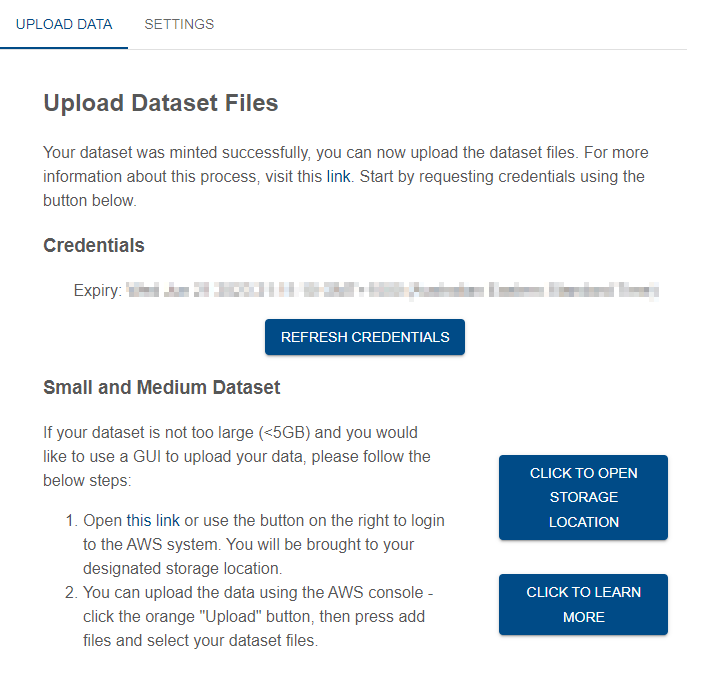
Next, open the link to AWS system, by either clicking on the Click to open storage location button or the link in the text. You will then be taken to the AWS S3 bucket location which will house the dataset files. The associated metadata record will be seen as a ro-create-metadata.json file.
| Uploading small to medium files |
|---|
 |
In the AWS environment:
- Click the orange Upload button.
- Click on Add files or Add folder depending on what you want to upload. Navigate to where the files are in your system and select them.
- Click OK. The files should appear in the Files and folders section in the AWS environment.
- Click on the orange Upload button at the bottom of the screen to complete the process.
- Click Close to return to the S3 bucket.
- Close the browser to exit.
You can add additional files to the dataset by repeating the steps above.
For further information, see the AWS uploading objects documentation here.
Uploading files via WinSCP
If you would prefer to use WinSCP to upload files of any size, instructions on how to do this are here.
Uploading files via the AWS Command Line Interface (AWS CLI)
If you would prefer to the AWS CLI to upload files of any size, instructions on how to use the AWS CLI are here.
Info! In order for you to use the AWS CLI for uploading you will need to install it first.
Please see this page for instructions on how to set up the AWS CLI on your system.