Data access to s3 with WinSCP
Overview
WinSCP is a client tool for Microsoft Windows. It allows for managing files between a local computer and remote servers. As Provena data is stored in AWS S3 buckets WinSCP can be used to transfer data to and from the data store.
Authentication
Required inputs to establish connection
You can obtain authentication parameters from a dataset record from within the Provena Data Store. Select a target preconfigure dataset and then the ‘Upload Data’ tab. Then click the ‘Generate Credentials’ button. You will notice that there are three parts to the credentials.
- AWS_ACCESS_KEY_ID
- AWS_SECRET_ACCESS_KEY
- AWS_SESSION_TOKEN
Also on Step 4. you will notice a command similar to aws s3 ls s3://rrap-storage-bucket/datasets/10378-1-#######/ from this command you will require just the data path including forward slashes /rrap-storage-bucket/datasets/10378-1-#######/. Replace the ## with your records handle id.
These are the requirements to establish a connection
Establishing a connection to Data Store S3 with WinSCP
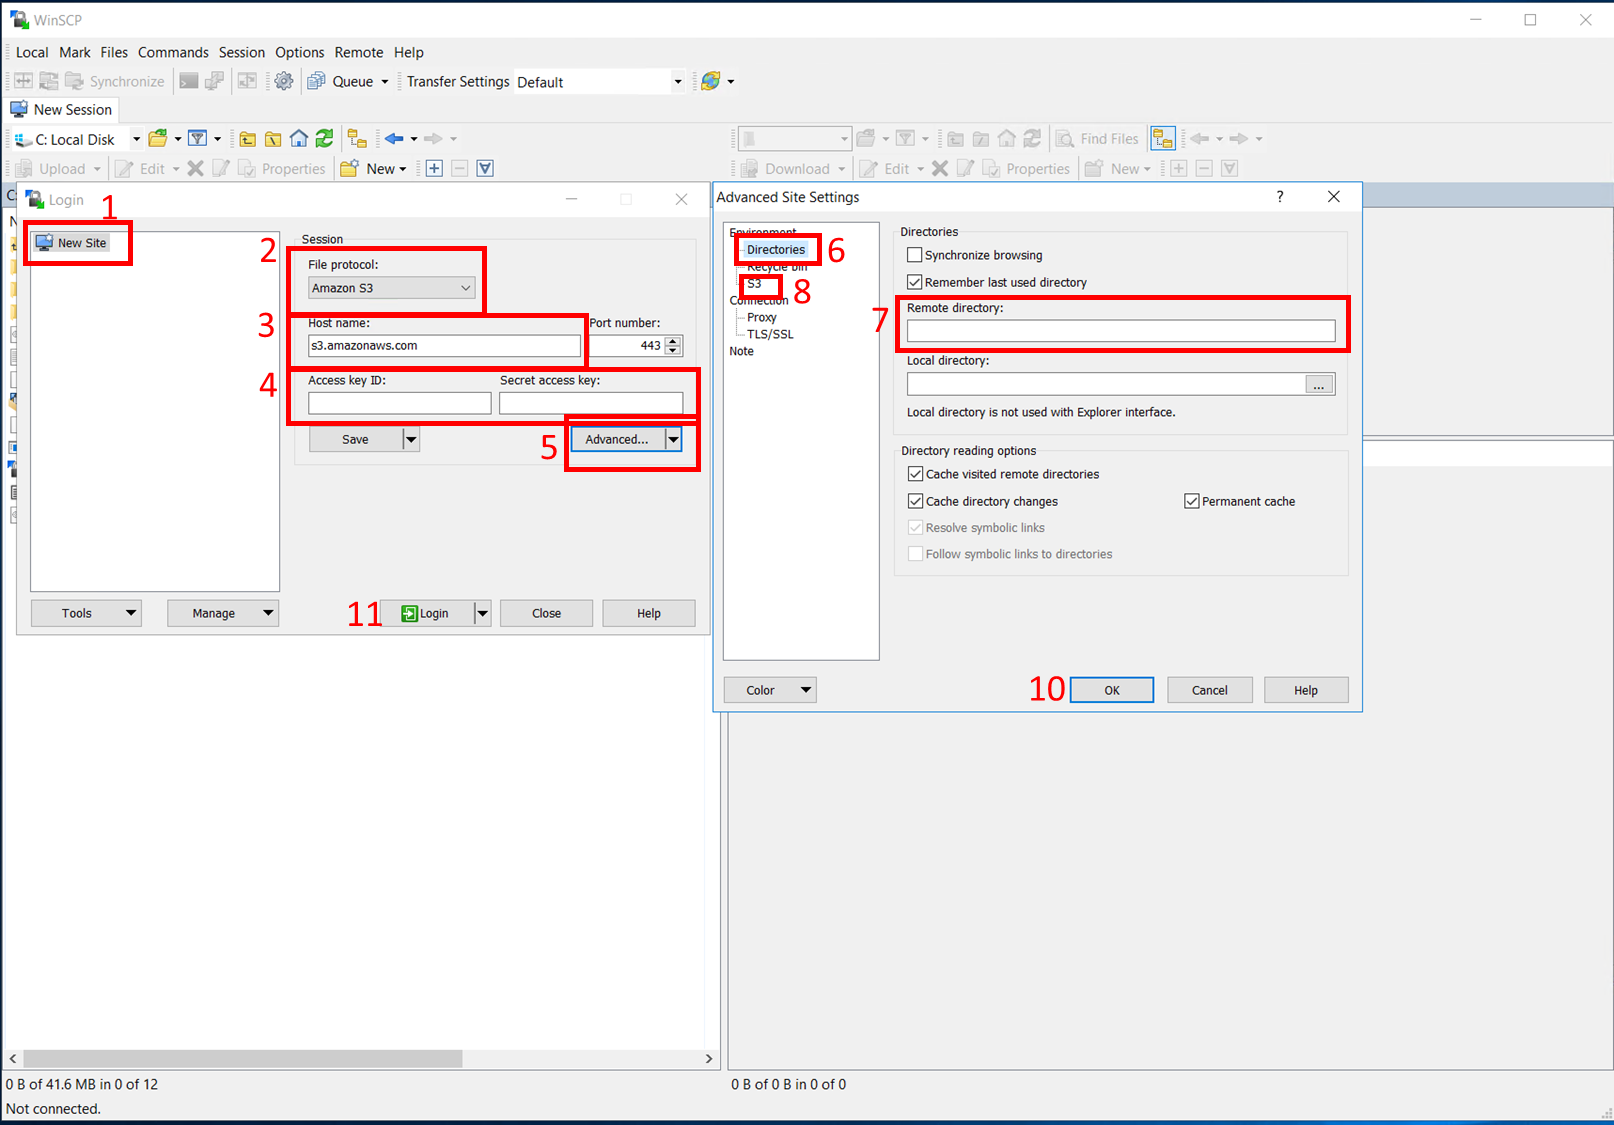
Open WinSCP and the Login dialog will appear, on the dialog enter the above credentials.
- Make sure the ‘New site node’ is selected
- On the New site node, select
Amazon S3as the ‘File protocol’ - Check that the host name is:
s3.amazonaws.comand the port number is443 - Enter your AWS user ‘Access key ID’ and ‘Secret access key’ values (without quote marks)
- Click the ‘Advanced’ button
- Select ‘Directories’
- Enter the above data path e.g.
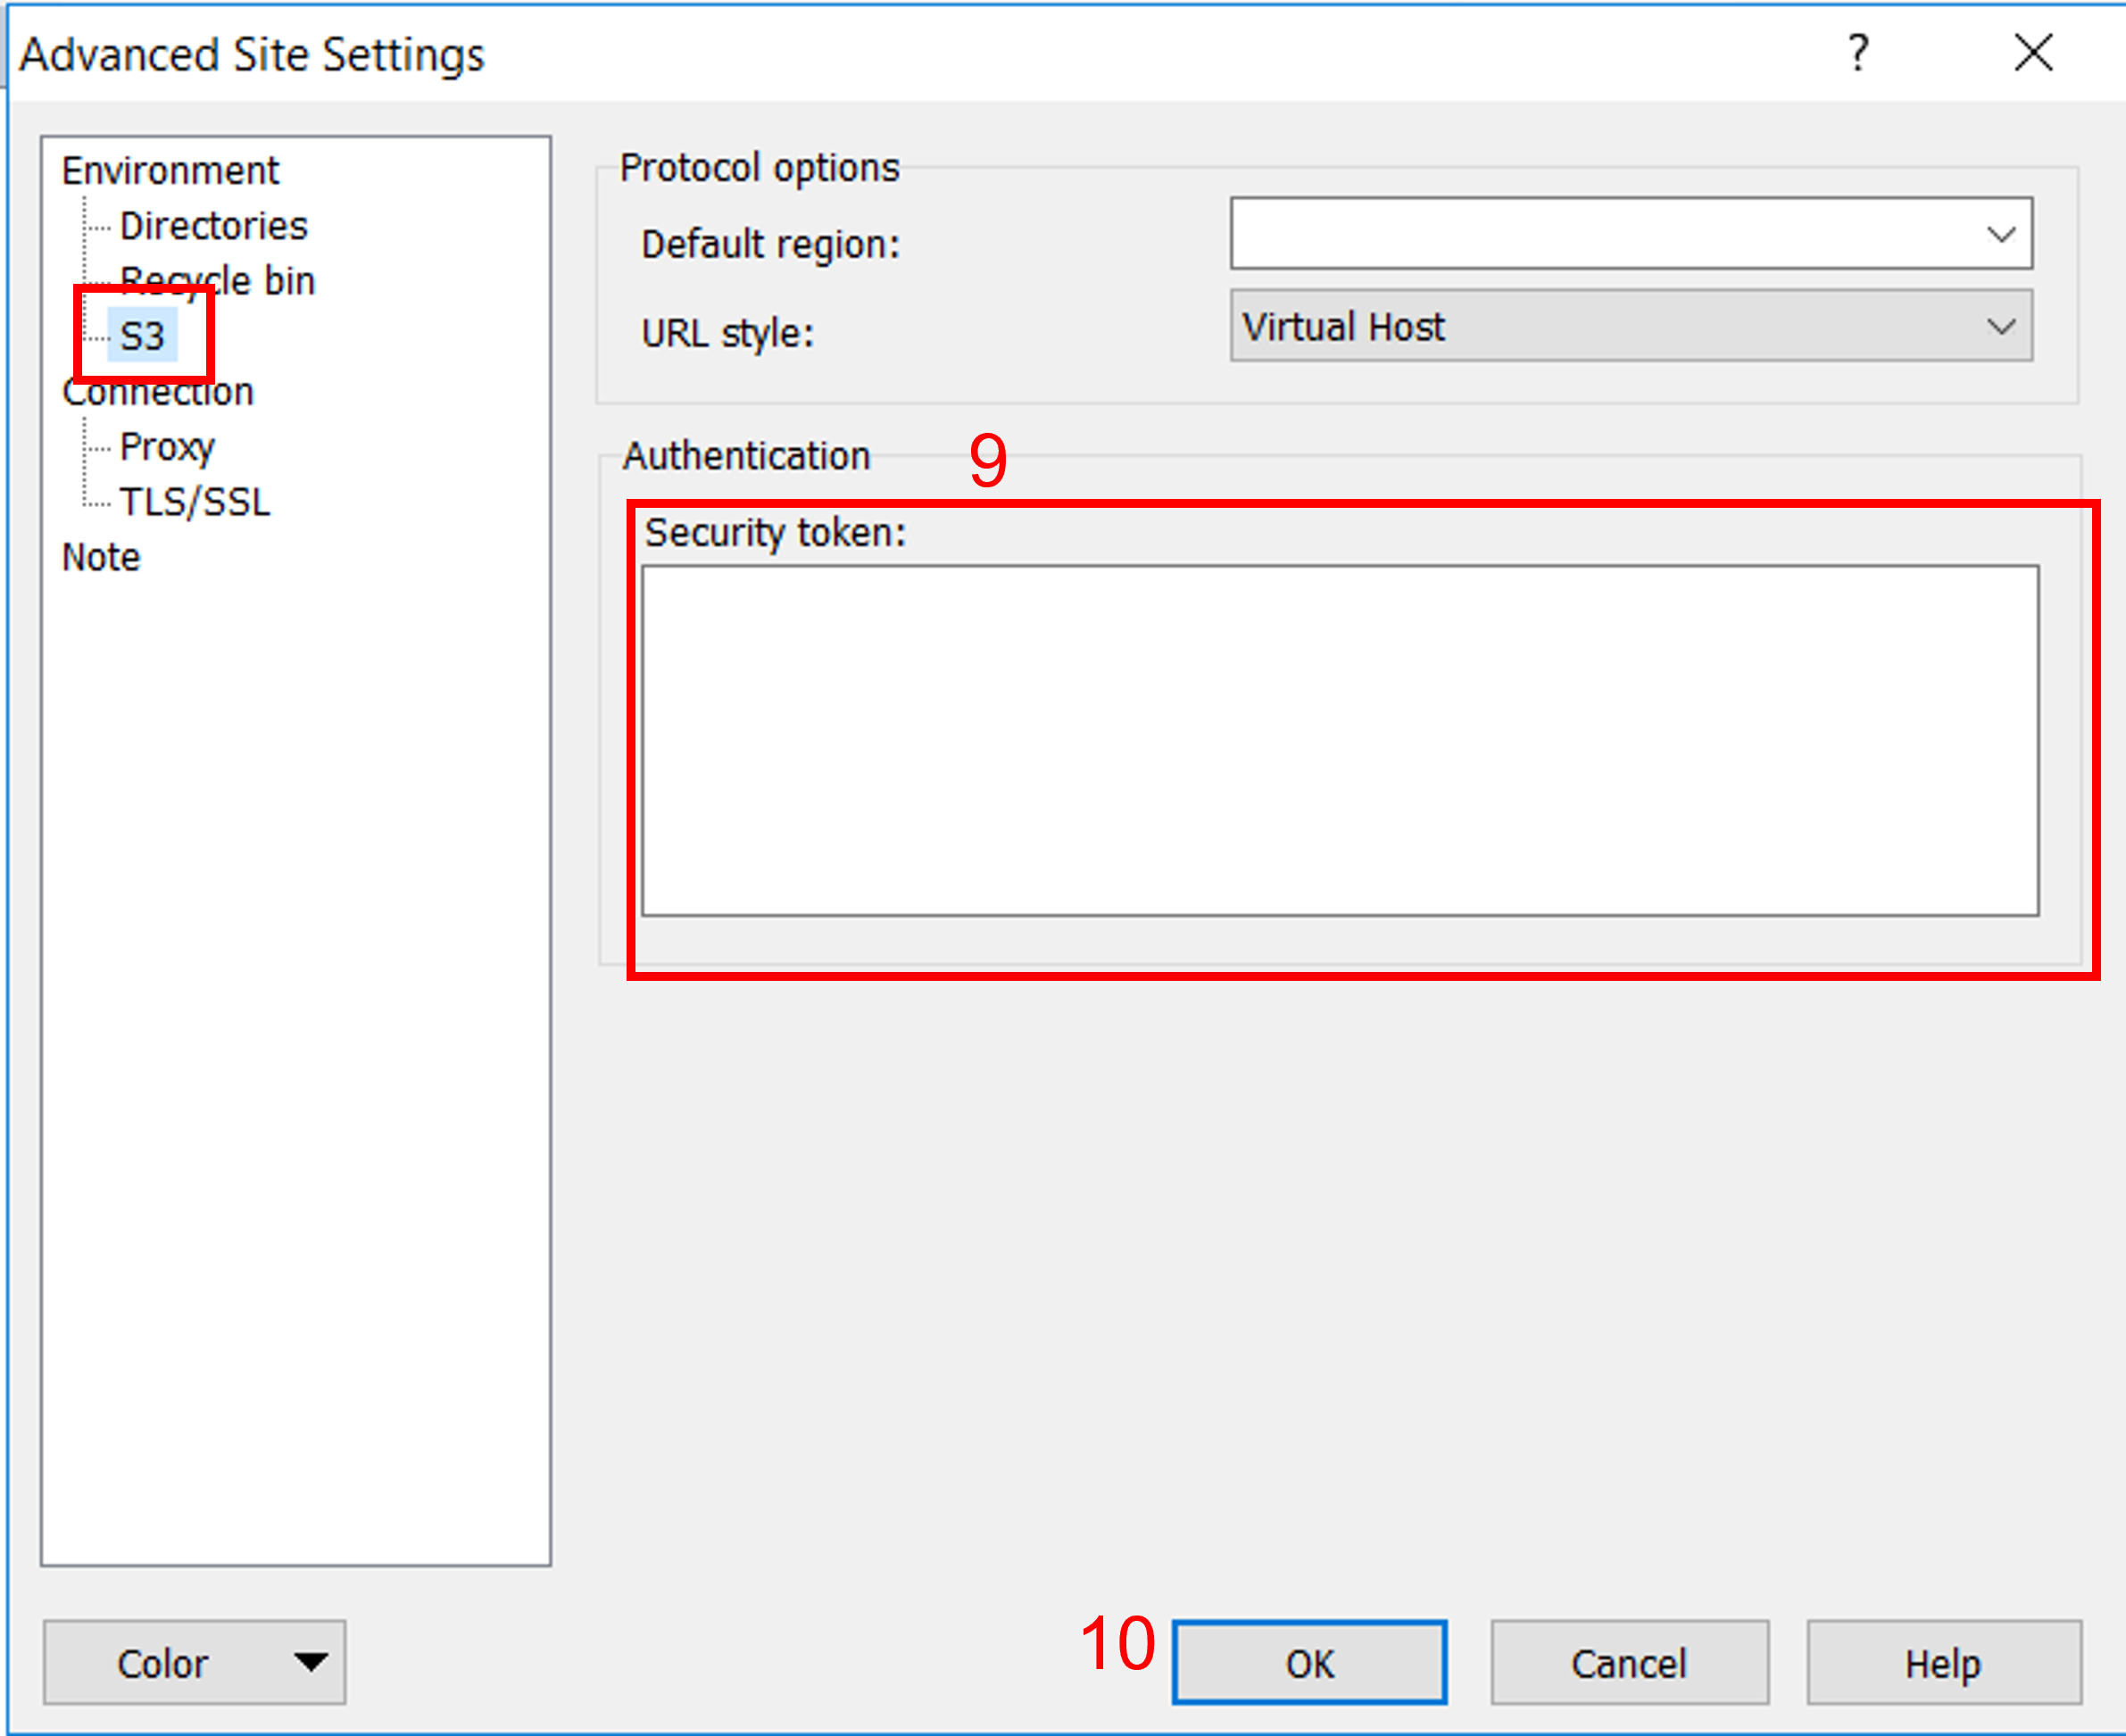
/rrap-storage-bucket/datasets/10378-1-#######/replace the # with your handle id - Select ‘S3’
- Enter your ‘AWS_SESSION_TOKEN’ as the ‘Security Token’
- Click ‘Ok’ on the Advanced Site Settings Dialog
- Click ‘Login’ on the Login Dialog
| WinSCP Login |
|---|
 |
| WinSCP Login (Advance settings) |
|---|
 |
Uploading
- Select folders or files for uploading
- Select the destination folder on the remote server (This MUST be YOUR registered dataset)
- Select Upload
| Uploading |
|---|
 |
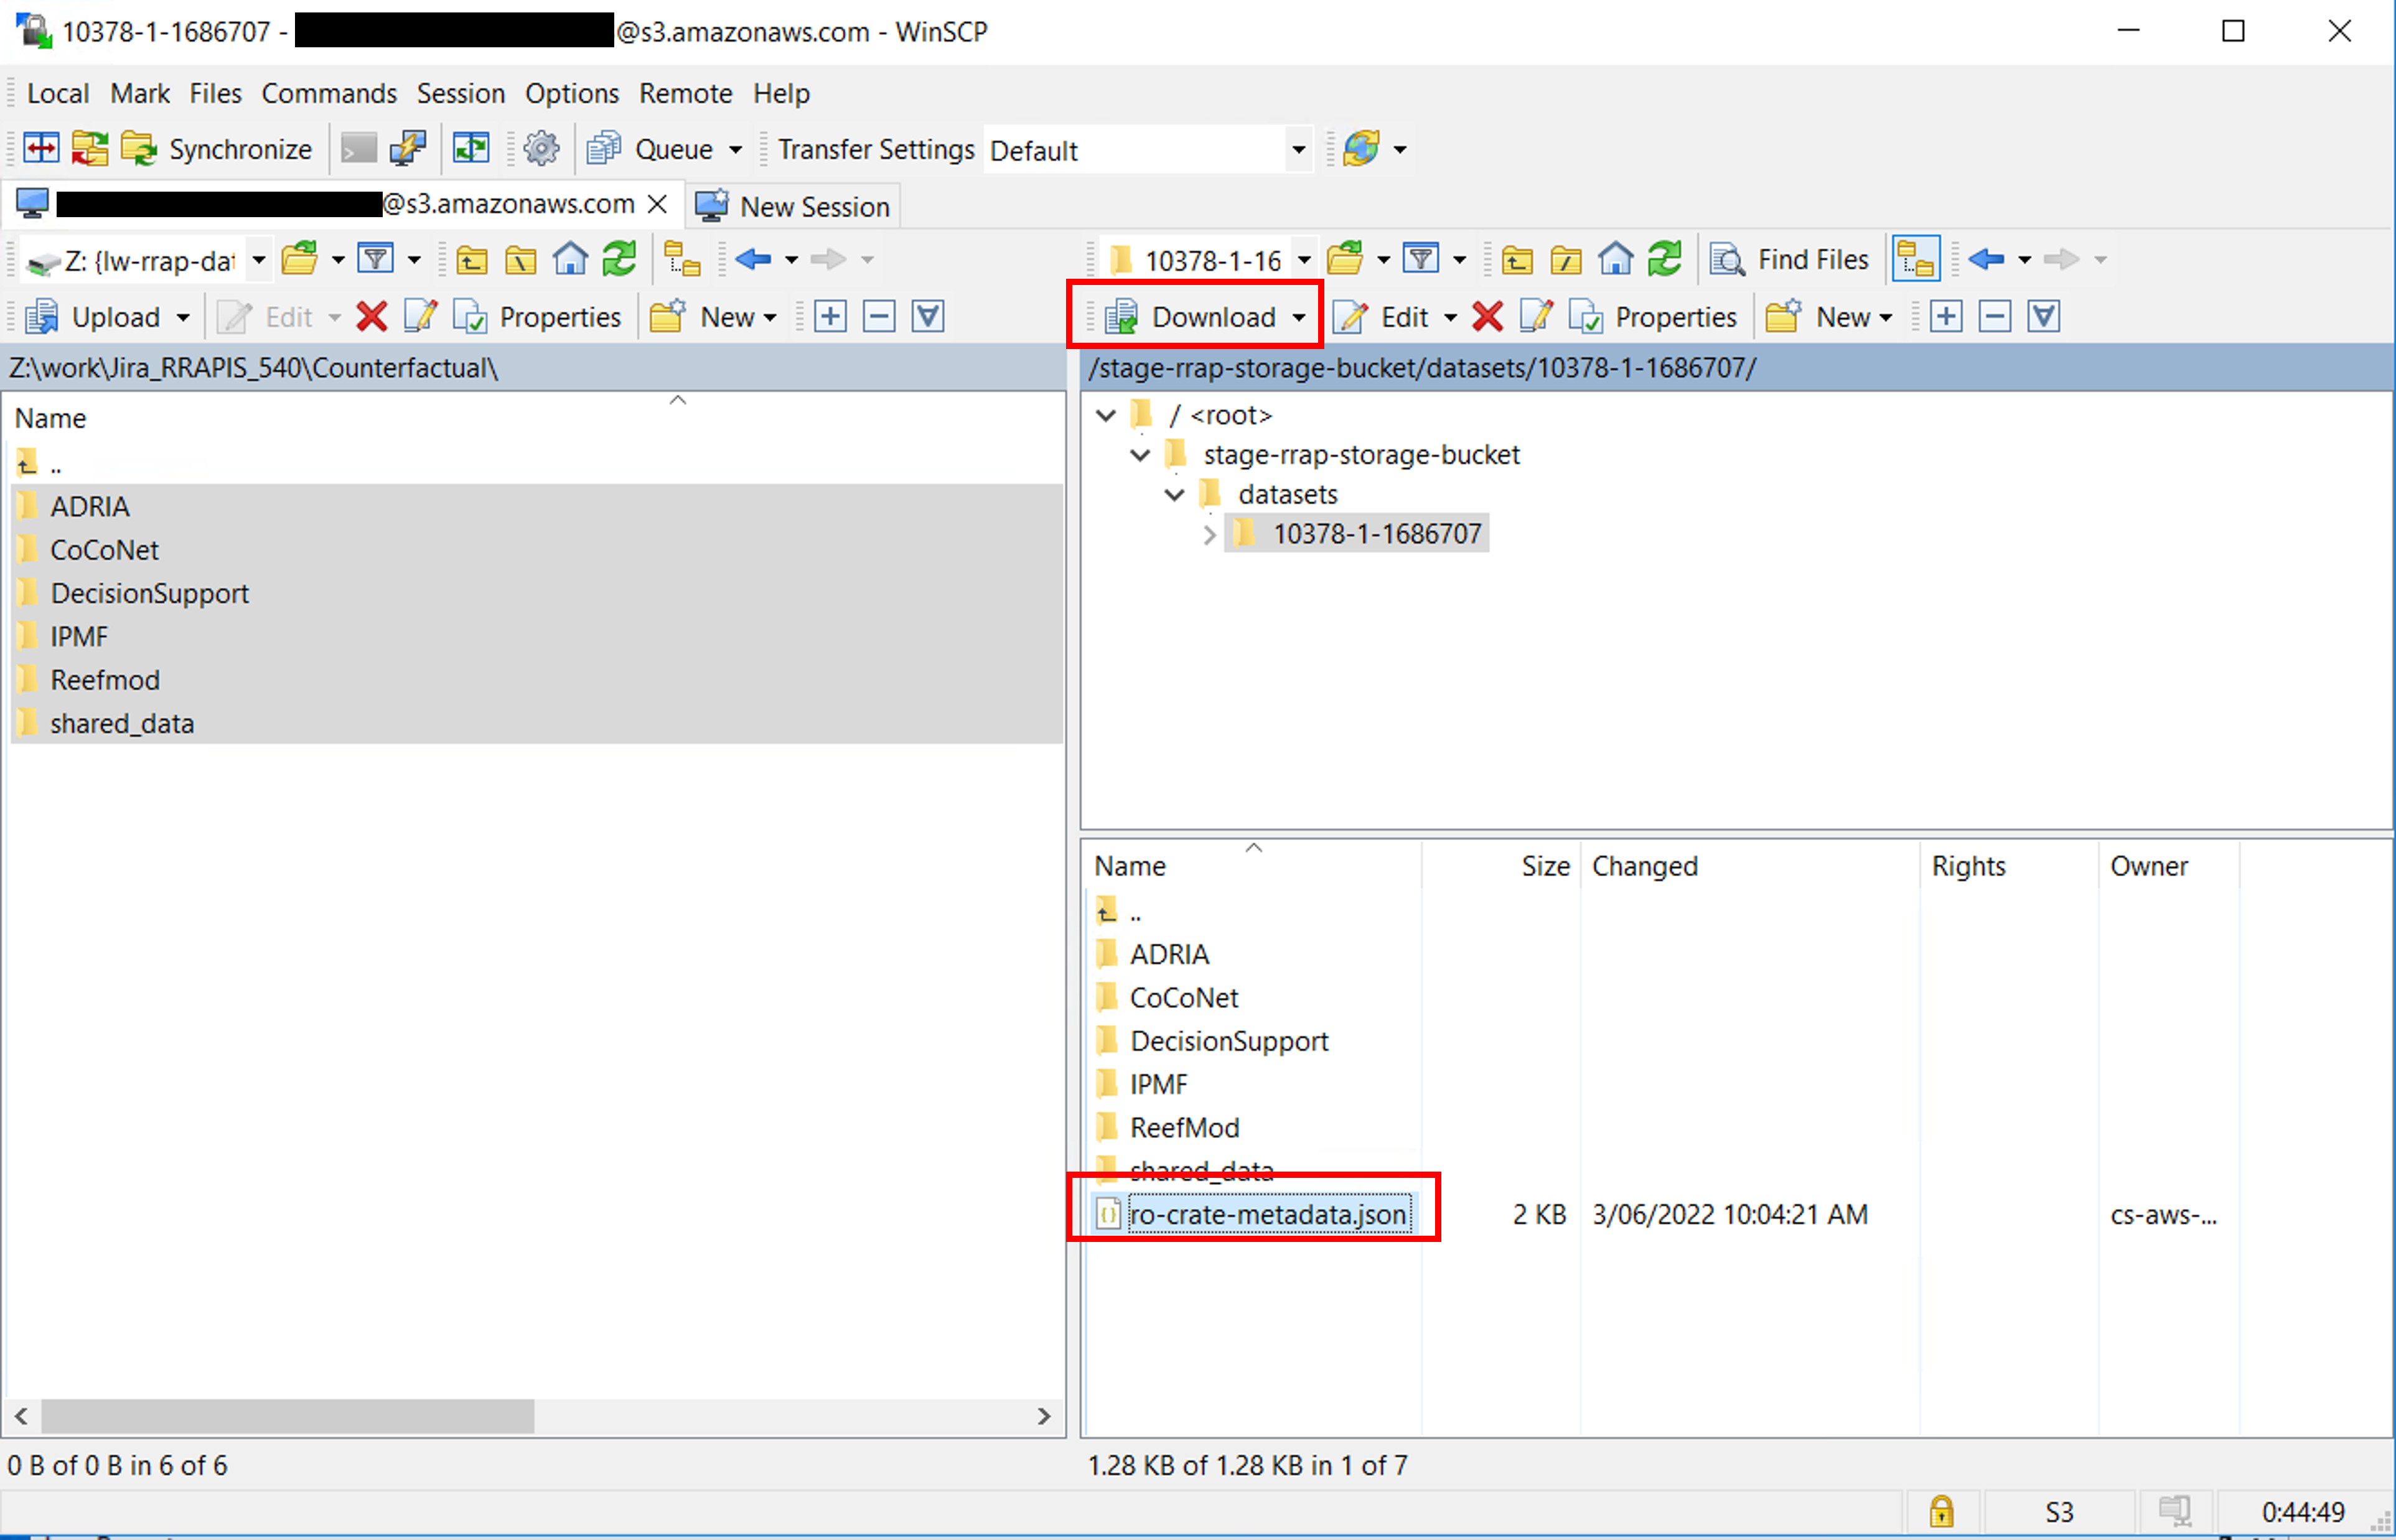
Downloading
- Select folder or file from the remote server
- Ensure you have selected the local folder to receive the download
- Select Download
| Downloading |
|---|
 |